Husband to an amazing wife and two adorable children. This website covers electrical engineering projects. I have Arduinos and a Raspberry Pi. The EE Lab has everything that I had available at university. This lab has grown and changed over 20+ years. You will learn C# (Arduino) and Python (Raspberry Pi). It covers circuit design. I have 30+ sensors that can be integrated.
Breadboard
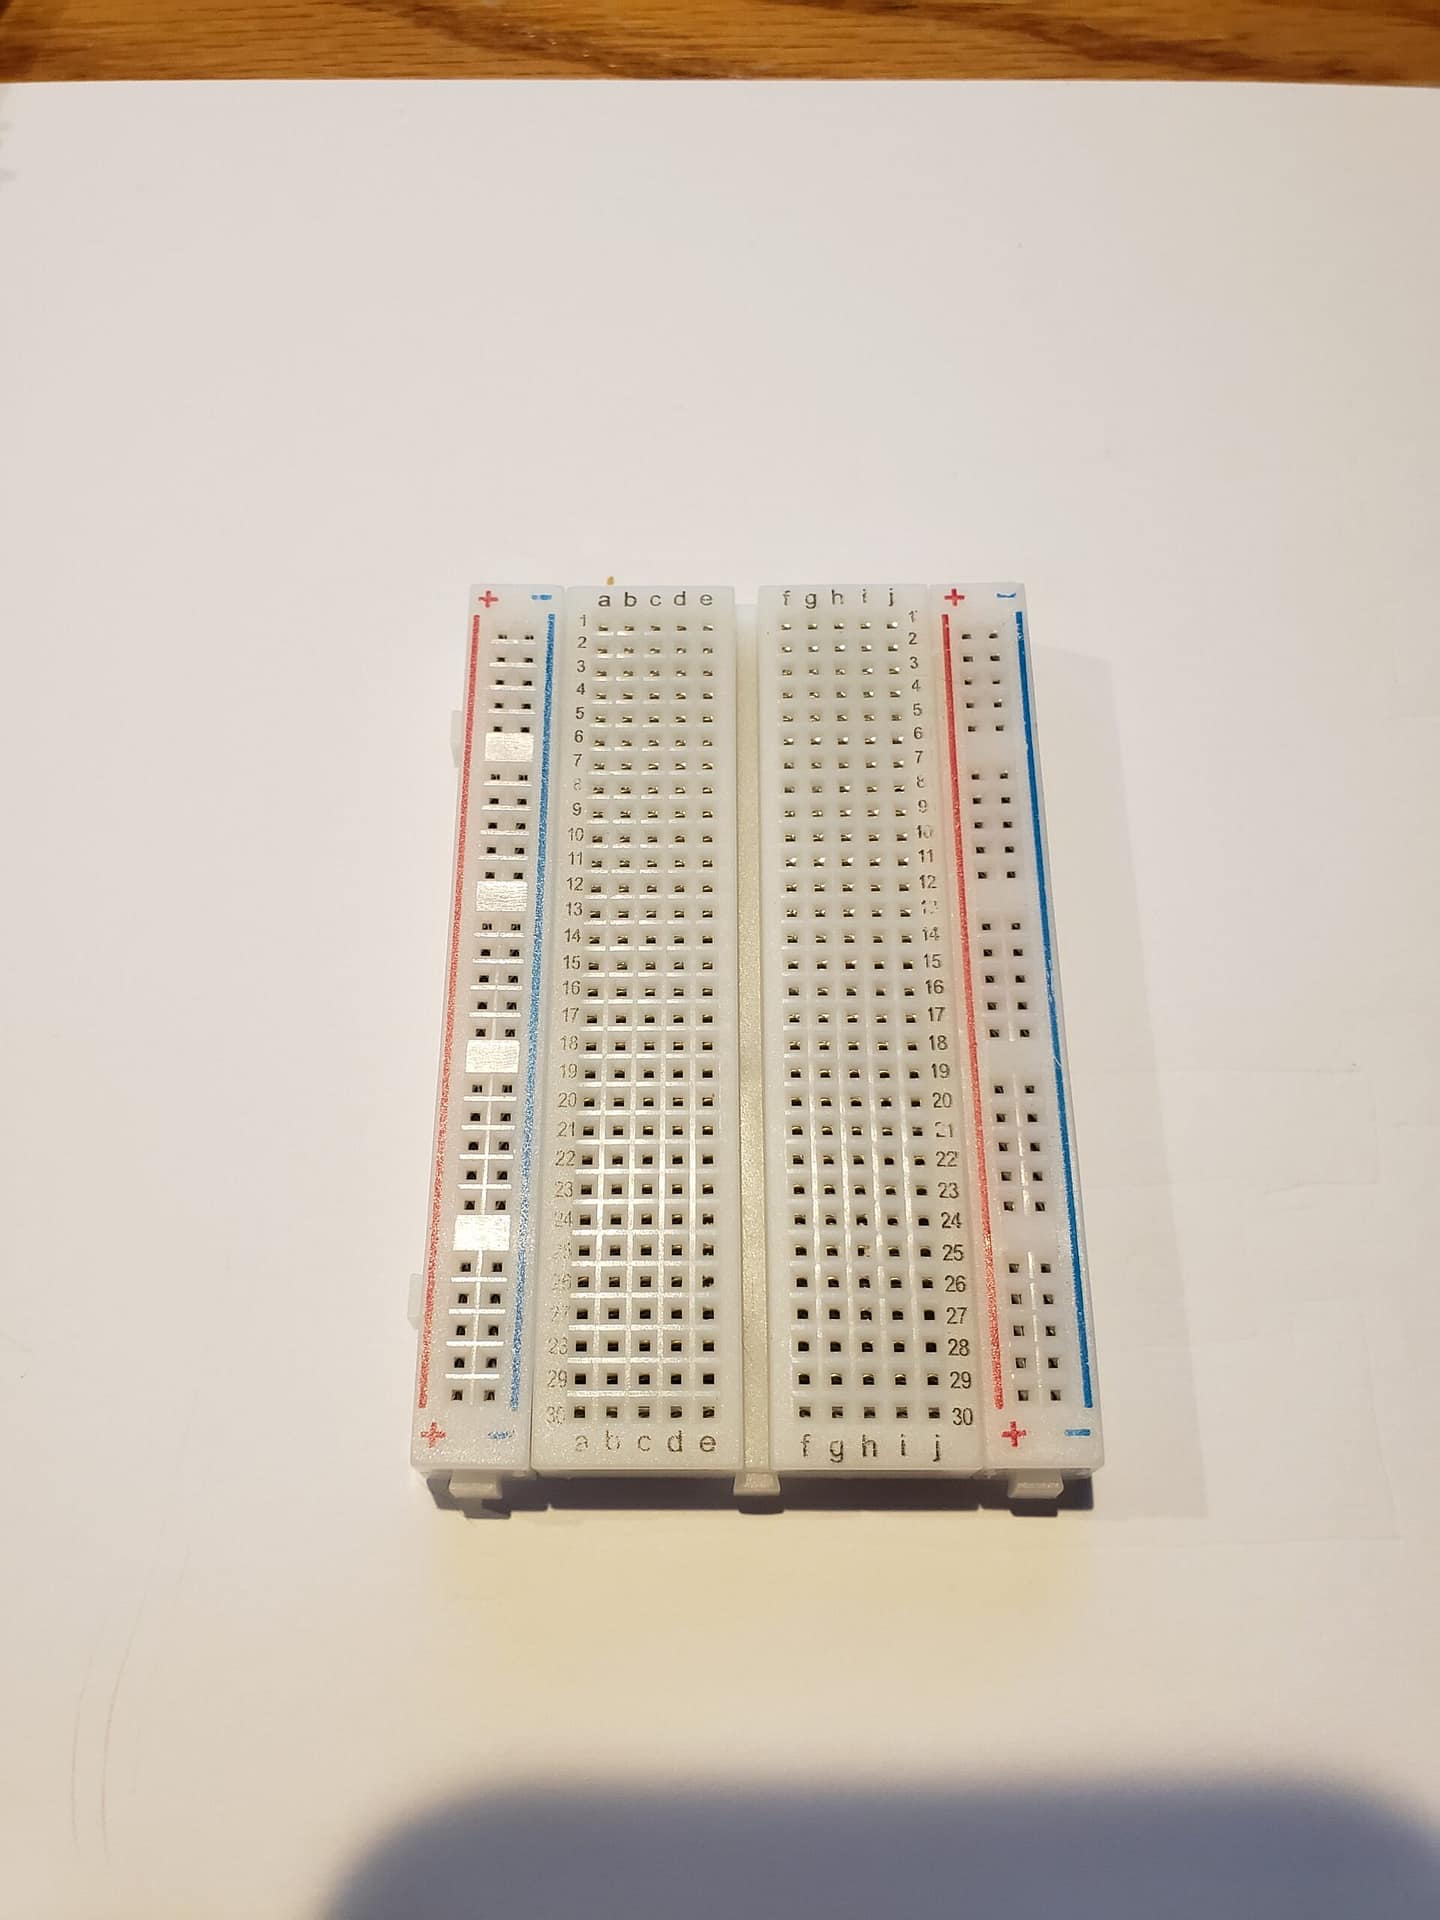
What is this breadboard? How do you use it?
You can click on the picture to enlarge it. The two rows on either side are marked + and -. The connect top to bottom. You connect the 3.3V or 5V to the +. You connect the ground or gnd of the device to the -.
In the center of the board you have a, b, c, d, e and f, g, h, i, j. Each row is numbered on this breadboard 1 to 30. You can buy a larger version of it. a to e and f to j are connected across each row. The center separator splits them.